Showing posts with label cookies. Show all posts

Tuesday, 22 July 2014

Triple Chocolate Chunk Cookies

Us Brits aren't so good at cookies, we're just not used to them. Biscuits are more of our thing, which I guess are just harder, crunchier cookies. Cookies are quite new to us, they are chewy, soft and tend to need to be purchased from Millie's, Subway or more recently supermarket bakery sections to get a decent one. Not anymore though...

After several experiments, most ending in near-biscuits rather than chewy cookies, I'm happy that I've finally mastered the art of cooking proper cookies. The experiments have revealed several learning points:

  1. Use a mix of brown sugar and white sugar to get the right chewy:crispy ratio
  2. Don't overcook them - it's tempting too, especially when you prod them and they are super soft, just leave them to cool on the baking tray for a little while before transferring to a wire rack
  3. Try and use the same measurement to dollop the mix onto the baking tray to ensure evenly sized, round, cookies.
Ingredients (makes 12):
  • 100g Dark Brown Sugar
  • 50g Caster Sugar
  • 85g Melted Butter
  • 1 egg
  • 1/2 teaspoon vanilla essence
  • 125g Plain Flour
  • 1/4 teaspoon of bicarbonate of soda
  • 1/4 teaspoon of salt
  • 150g chopped chocolate (50g each of milk, dark, white)
  1. Preheat the oven to 180c and line two baking sheets
  2. In a large bowl mix together the sugars and melted butter until well combined.
  3. Add the egg and vanilla essence and mix well.
  4. Sift the dry ingredients into the bowl and stir in, once combined pour in the chopped chocolate and stir until coated.
  5. Using a tablespoon and a teaspoon scoop the mixture onto the baking trays, six to a sheet.
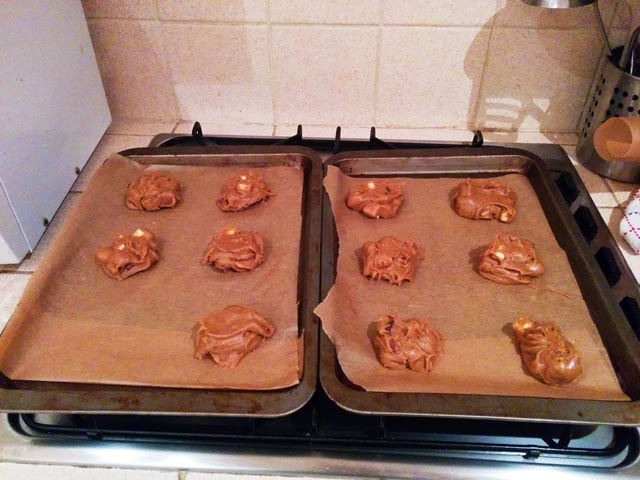
  6. Pop into the oven for 10-15 minutes, checking regularly, you want them just to be slightly crisp on the edges.
  7. Leave to cool for 5 minutes on the baking tray and then transfer onto a wire rack to cool/gobble up!


Wednesday, 23 April 2014

RAWR - Dinosaur Cut Out Sugar Cookies

Having recently moved to a new area the first thing I did was check out the high street, I was delighted to find a cookware shop (my purse cried). Luckily I managed to restrain myself and only came out with this cute dinosaur cookie cutter. I like to think this is a diplodocus as this was always my favourite dinosaur...I like it's name. Of course once armed with a new cookie cutter a batch of cookies have to be made!

I never can figure out if I should call these biscuits or cookies. Cookies to me are large, soft, chewy discs of goodness whilst biscuits are smaller, crunchier and can be cut out using a cutter.


Regardless of how you define a cookie or a biscuit these are tasty and slightly soft, the royal icing gives them a nice satisfying crunch. Not bad for such a simple recipe, all you need is a little extra time to leave the dough to chill.

For the cookie:
1/2 cup butter
3/4 cup sugar
1 egg
1 teaspoon vanilla extract
1.5 cups plain flour
1/4 teaspoon baking powder
1/4 teaspoon salt

For the icing:
250g royal icing
40ml cold water
small squirt of green gel food colouring


  1. Using a stand mixer, or a bit of brute force with a wooden spoon, cream the butter for a couple of minutes until it is smooth. Add the sugar to the bowl and beat again until it is nice and fluffy. 
  2. Add the egg (don't worry if it curdles - keep beating) and then add the vanilla extract.
  3. Add the flour, baking powder and salt and mix until it is just combined. 
  4. Pop onto a piece of cling film and press down to form a rough circle, wrap it all up in cling film and leave it in the fridge for about an hour. This is essential so don't be tempted to skip it!
  5. Preheat your oven to 180c and line two baking trays with grease-proof paper.
  6.  Remove the dough from the fridge and put half the dough on a piece of grease-proof paper, cover it with another piece of grease-proof paper and then roll it out with a rolling pin until it's about 1cm thick.
  7. Use a cutter to press down on the dough and then transfer the shapes to your baking trays. Put the baking trays in the fridge for another 15 minutes. This is to chill it out again so the cookies keep their shape when they are cooked. 
  8. Remove from the fridge and bake for about 10 minutes until they are a very pale golden colour.  They will become crispier as they cool so don't worry if they're soft when you first remove them. Leave to cool on a wire rack.
  9. Whilst cooling whisk together the royal icing and water for 5 minutes until it forms peaks, then add the food gel colouring. Using a piping bag (I use a disposable one) trace the outline of your shape.
  10. Dilute some of the icing using a bit more water and use a teaspoon to place it within the outline, use the back of the spoon to spread your icing right up to your outline.