Friday 12 December 2014

Christmas in Brno

There are few things I truly love about London. However, the close proximity to major airports served by budget airlines is one of them. I can hop on an EasyBus (the cheap and terrifying bus transfer) and onto a Ryanair or Wizz Air flight and get away for the weekend for under £50 return and I like to try and get a couple in each year.

This year we did our major holidays in Egypt and India and our weekend breaks in Katowice, Poland and Brno, Czech Republic. Over the years though I've been to Venice, Bremen, Frankfurt, Milan, Oslo,  Dublin, Warsaw, Wroclaw and probably a couple of others that I can no longer remember.

When I tell people this they presume I love to travel, the real truth is though that I love to eat. Eastern Europe offers some fantastic food at a miniscule amount of money compared to home.

In Katowice we had three course meals with a leg of goose, a whole stuffed apple and roast potatoes for £12. We also gorged ourselves on the local dumplings; piergoi.

I rarely blog about my adventures but thought it was about time I did after eating a ridiculous amount of food at the Christmas market in Brno.

It started so innocently with a chimney cake - how could I resist the warm fire with the wafting smell of cake and sugar and caramel? The dough is coiled around a thick cylinder before being rotated over an open fire until golden brown. Once cooked it is pressed into a sugary, nutty bath before being sliced off and the hollow cakes served wrapped in napkins. I ate it slowly, uncoiling it as I went. The cost? 50kr - £1.40 a meagre price compared to what you'd pay at a street food stall in London.


We continued to walk through the market, taking in the smell of the mead wine (£1) and the sights of the locals queuing to stand on a  platform to ring a bell.Then disaster happened, well, for our cholesterol anyway. We walked into the food stalls. People were gathered round tables eating deep fried pancake looking things and big meaty sausages; a whole pig was hoisted up ready to be cooked.

We ordered a potato pancake and a sausage with difficulty and then headed back to one of the tables to share our finds (90kr - £2.50).

The potato pancake (called bramboracky - we found out later) was dripping with grease, fresh from being deep fried. It was stuffed full of garlic and caraway seeds, it was, I'm not ashamed to say, delicious. The grease made it hard to eat large quantities but you felt in the cold that really you needed these calories especially the crunchy edges. The sausage was also delicious and no gristle in sight, it was served with bread and a mustard that wasn't too hot, it was just right.

We then stretched our legs and headed up to the second part of the market about 300m down the road. This one featured more craft stalls selling Christmas decorations, wooden spoons and toys. It also happened to have even more food stalls, just what we needed!


This time we ordered a Langose (30kr - 80p), it looked like a pizza but tasted more like a fried Yorkshire pudding. It's essentially a deep fried flat bread - healthy! We topped it with cheese and ketchup but regretfully no garlic - I hadn't realised it was traditionally served this way!

After all this we did manage to eat a main meal in the evening, again for a reasonable price. All washed down with the local beer which was actually cheaper than the bottled water!

I'd certainly recommend Brno for a weekend break. In between the feasting we visited many of their local landmarks. The most notable of which is an ossuary which is a mass burial site, Brno's was only recently discovered (2001) and has been transformed in a modern way, it's certainly worth a look. Other attractions include the castle (steep walk up!) and cathedral (fantastic views from the top of the towers).

Monday 8 December 2014

Chocolate Truffles - Christmas Hamper

This year I've made a few Christmas hampers to give as gifts. It isn't a cost-saving exercise, trust me - high quality ingredients don't come cheap! Instead it was to give something thoughtful and consumable that wouldn't clutter the home.

One of the items I included in the hamper was chocolate truffles. Truffles are surprisingly easy given their rich, decadent taste. Be warned though, these are quite bitter so if you don't appreciate a good dark chocolate these might not be your thing!

Ingredients:

  • 300g high-quality dark chocolate - I used Green & Blacks
  • 300ml double cream
  • 50g unsalted butter
  1. Chop the chocolate into small chunks and place in a bowl.
  2. Heat the cream and butter in a saucepan over a medium heat until it just begins to simmer. Don't boil.
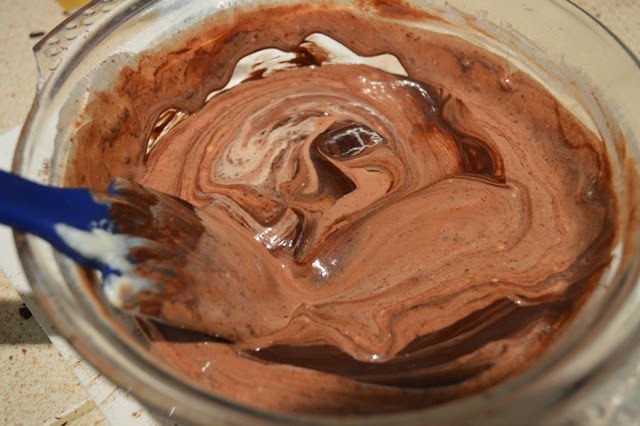
  3. Pour the cream over the chocolate and stir until all chocolate is melted into the mix. Place into a fridge overnight.
  4. Use a small spoon or melon baller to cut through the mix and make even sized truffles.
  5. Roll into balls using your hands. It's important to keep your hands cold so run them under cold water frequently.
  6. Roll into your toppings to coat them and place into small candy cases and then refrigerate in an air tight container.
I've been told that you can freeze these up for a month and then defrost in the fridge the day before you want them.

Wednesday 26 November 2014

The Cake is NOT a Lie

Recently it was a friend's 21st birthday. She's into her gaming and I'm not so it took a bit of searching online before I found the perfect cake; the portal cake! Apparently this is a famous cake from the game Portal which is promised as a reward but never delivered, hence "the cake is a lie".

What I was aiming for.
Nailed it!

I didn't realise until afterwards that actually it was supposed to be a black forest gateaux and instead made a chocolate cake - luckily this worked to my favour as she doesn't like black forest gateaux!

This is a super easy cake based on a well tried and tested recipe. I'd certainly recommend giving it a go!

For the cake:

  • 4 tablespoons of cocoa powder
  • 2 tablespoons of boiling water
  • 8oz/225g self raising flour
  • 8oz/225g stork or butter
  • 8oz/225g caster sugar
  • 4 eggs
  • 1 teaspoon of baking powder
For the icing:
  • 4oz/100g plain chocolate
  • 16oz/450g icing sugar, sifted
  • 7oz/200g butter, softened
  • 2oz/50g cocoa powder, sifted
  • a little water or milk
For the decoration:
  • 1 small tub extra thick cream
  • 75g/3oz plain chocolate
  • 75g/3oz milk chocolate
  • 8 strawberry gobstobbers (or 8 cherries - your choice)
  1. Preheat oven to 180c. Mix the cocoa powder and hot water together in a small bowl until a paste is formed.
  2. Place the remaining cake ingredients into a large bowl or your kitchen aid bowl and mix together until all combined. Add in the cocoa paste and mix until the batter is evenly brown.
  3. Grease three cake tins, line with a circle of greaseproof paper and grease again. Split the batter between the tins and cook for 25 minutes.
  4. Once a toothpick comes back clean when pushed into the cake and it springs back when touched, remove the cakes from the oven and cool completely on a wire rack.
  5. To make the icing melt the chocolate in a microwave on 30 second bursts until melted. Leave to cool for 5 minutes.
  6. Sift the icing sugar and cocoa powder in a bowl, cream with the butter using the back of a spoon - watch out as icing sugar will often get everywhere!
  7. Once a thick butter icing is made add in the melted chocolate and mix until thoroughly combined. Use a little water or milk to loosen the mix until it is at a consistency that can be easily spread.
  8. Spread about a quarter of the icing onto the first bit of cake, place another cake on top, repeat with the icing. Retain 1/4 of the icing spread the remaining down the sides of the cake. This is creating a "crumb coat" that traps any crumbs from showing in your final icing (it doesn't actually matter too much for this cake). Pop your cake in the fridge for 10 minutes.
  9. Meanwhile grate your two chocolate bars. Try and keep it as cool as possible so you don't end up with it melted. Also fill your extra thick double cream into an icing bag and pipe 8 dollops onto a piece of greaseproof paper, dab them down with your finger to form circles.
  10. Remove your cake from the fridge and apply your final layer of icing, press the chocolate flakes onto the cake and finally use a spatula to evenly space the 8 circles of cream around the cake. Top each circle with a gobstopper.

Sunday 23 November 2014

Stir up Sunday

This year I'm making gifts for some of our family. This isn't necessarily a cost-saving move, in fact the ingredients for a Christmas cake really mount up - especially with all the alcohol involved! Instead it is more to provide something that can be consumed and won't lie around collecting clutter or being donated to a local charity shop in the new year. I hope they appreciate all the effort that has gone into creating the goodies I've got planned.

So, I thought I'd start with a Christmas cake. There is no more traditional time to make it then Sunday 23rd November; Stir up Sunday. This is the final Sunday before advent and traditionally the day that Christmas puddings would be made and stirred by all the family, making wishes as you went round.

As this is my first year attempting my own Christmas cake I scoured the internet for a simple but tasty recipe and found James Martin's Make & Mature Cake. It appealed to me as it was a simple case of buying a bag of mixed fruit (picked up on offer for £2 for a kg in Waitrose) instead of chopping lots of little pieces, maybe I'll do that next year when I'm a bit more experienced in the world of fruit cakes!

I actually doubled the mix and made 4 7" cakes. They aren't massively tall but think they'll look great in a few weeks time once iced, for now though they are staying naked so I can continue to feed them. I made these in two batches as I only had two tins and there was no way I had a pan large enough for 2kg of fruit at once.

Ingredients (for four cakes):

  • 2kg mixed food
  • zest and juice of 2 lemons
  • zest and juice of 2 oranges
  • 300ml sherry + extra for feeding (my alcohol of choice as it's not as potent as whiskey)
  • 500g butter, softened
  • 400g light brown sugar
  • 350g plain flour
  • 200g ground almonds
  • 1 tsp baking powder
  • 2 tsp mixed spice
  • 1 tsp ground cinnamon
  • 1/4 tsp cloves
  • 100g flaked almonds (didn't double this)
  • 8 large eggs
  • 2 tsp vanilla extract
  1. Place your fruit, lemon orange, sherry, butter and brown sugar in a large pan. Bring it to the boil and then simmer for 5 minutes. Remove from the heat and leave to cool for 30 minutes.


  2. Heat your oven to 150c - this is a low, slow cook. Grease your tins, making a large 'collar' from greaseproof paper, line the base too.
  3. Once cooled a little add the remaining ingredients and stir thoroughly until all combined, make a wish too.
  4. Divide the mix between the tins and place in the oven for 2 hours. I didn't find the time decreased for cooking, I suspect the original recipe required longer than 2 hours.
  5. Remove from the oven and skewer all over, spoon over a tablespoon of sherry. Leave to cool completely in the tin before removing all paper and wrapping in cling film.
  6. Repeat for the next two cakes!
I'll keep you updated on the feeding and icing process. Wish me luck!

Thursday 16 October 2014

Sun-dried Tomato and Parmesan Biscuits

Now that the Great British Bake Off has finished Mary Berry & Paul Hollywood have released three episodes of "masterclasses" - where they show us how they'd have done the bakes.

The first episode featured these sun-dried tomato and parmesan biscuits and I have to say the minute I heard "sun-dried tomato" I was sold. Although I'm not a fan of regular tomatoes I find their dried, acidic and intensely flavoured sun-dried cousins irresistible.

I was pleased to find I could pick up the rather obscure sun-dried tomato paste in Waitrose. It's not my usual supermarket but they have such a fantastic range of ingredients that I have to pop by occasionally when I'm looking for a little something extra to add to my baking. I was disappointed to discover that if you're a MyWaitrose card holder you can get 50% off some of their baking range - great if you have a card...not so great if you don't and temporary cards aren't issued instore any more.

Ingredients: 
187g/6.5oz plain flour
2 eggs
0.5 tsp salt
62.5g/2.25oz unsalted butter, softened
40ml cold water
40g/1.5oz grated parmesan
1 tablespoon sun-dried tomato paste

Method:
1. Beat the flour, one egg, salt, butter and water together in a mixer for around 5 minutes, until a soft dough is formed.

2. Add in the parmesan and sun-dried tomato paste and mix until combined.

3. Put dough on a lightly floured surface, roll out until 3mm thick and then refrigerate for at least 30 minutes. Pre heat oven to 200c.

4. Cut out using a cutter and place on a lightly floured baking tray. Beat the remaining egg and gently apply an egg wash. Bake for 10-15 minutes, until golden.

Friday 10 October 2014

Genoise Layer Cake - Attempt 1: FAIL!

08:27 Posted by Anna , , , , No comments
I've been meaning for a while to bake my way through all the types of sponge cake, meringue and pastry. I thought this would be a perfect way to test all the skills I've gained baking over the last decade or so. So today I finally got round to my first bake.

The first type of cake I've decided to make is a Genoise. It's a very delicate sponge which is made my whisking the entire egg, this is different to something like an angel cake where only the egg white is used.

I've read lots of recipes and some say to beat the eggs and sugar over a saucepan and some just say to whisk and whisk and whisk. However, knowing that warmer eggs produce more volume when whisked I decided to go down the less-faff route of simply popping the eggs into a bowl of quite warm water for 5 minutes.


Ingredients:

  • 6 medium eggs, warmed for 5 minutes in a bowl of warm water
  • 130g caster sugar
  • 1 teaspoon vanilla extract
  • 75g butter, melted
  • 130g plain flour
  • 1/2 teaspoon salt
Method:
  1. Preheat oven to 180c. Line, grease and lightly flour two cake tins.
  2. Break the eggs into the bowl of your Kitchenaid, add the sugar and vanilla. Beat on high speed for 10 minutes until trebled in volume. If using a hand mixer this may take 15 minutes.

    Note the trail across the top this is called a 'ribbon'.

  3. Whilst the eggs are being whisked melt the butter in a microwave and set aside to cool.
  4. Mix together the plain flour and salt in a small bowl. 
  5. Once eggs are beaten pour into a larger bowl. Sift a third of the flour mixture into the bowl and fold in with a spatula being careful not to knock all of the air out. Add another third, fold in, then repeat with the last third.
  6. Take a small amount of mixture and mix it in with the melted butter. Pour the butter mixture back into the large bowl and fold in carefully again. 
  7. Split the mixture between the two cake tins and bake in the over for around 20 minutes.
I removed the cakes from the oven and notices they hadn't risen much. I gave the five minutes to begin to cool down before removing them from their tins. When removing them I noticed they felt quite heavy - much to my horror. Oh well, I thought, I can probably salvage it somehow. Sadly not - they were like hard, rubbery discs!

I've turned to the internet for a bit of help and it would appear that it could have been a couple of things. 1 - I may have not mixed enough of the mixture into the butter before returning it to the bowl or 2 - I simply just didn't mix through the ingredients enough. Of course I'm not going to give up there, I'm determined to nail this recipe. I just thought it would make a refreshing change to talk about a baking disaster rather than a success for once!

Wednesday 3 September 2014

Iced Finger Buns


Iced fingers are a classic British treat and you'll always find them stocked in the high street bakery. Sometimes this soft bun will be filled with whipped cream and jam and other times there is just a drizzle of icing over the top either way it's a satisfying treat.

This, again, is another Paul Hollywood recipe. He seems to be the miracle worker with yeasted doughs so when his recipe came at the top of the search results I knew I could trust the recipe to work and as always I wasn't let down.

Ingredients:
Buns:
250g strong plain bread flour
25g caster sugar
20g unsalted butter
1 egg
7g sachet of instant yeast
1 tsp salt
75ml warm milk
70ml water

Icing:
100g icing sugar
2.5 tsps cold water


  1. Put all the ingredients for the buns in a large bowl, but hold back around half to a quarter of the water. Using your hands begin to form a dough - if required add more water.
  2. Once a dough has formed knead in the bowl for 4-5 minutes before turning out onto a lightly floured surface and kneading for a further 10 minutes.
  3. Once smooth and elastic place the dough in a lightly oiled bowl and cover with cling film. Leave to raise for about an hour or until it has doubled in size.
  4. Once risen divide the dough into 6 equal pieces. You can use a scale to weigh the dough and divide by 6 to ensure regular shape.Form each piece into a bowl and then roll with the palms of your hands into sausage shapes of equal length.
  5. Place the dough onto a baking rack, ensuring there is space for them to double in size. Cover with cling film again and leave to rise until doubled in size. Meanwhile preheat the oven to 220c/Gas Mark 7.
  6. Once risen remove the cling film and bake in the over for 10 minutes. Remove from oven and leave to cool.
  7. Mix together the icing sugar and water to form a thick icing. Dip the buns in the icing and use the back of a spoon to even the icing out. 

Saturday 30 August 2014

Cheese and Bacon Oval Loaves


Bread is one of my favourite types of baking, in fact any yeast based bake is. Slightly inspired by the Great British Bake Off's bread week I turned to Paul Hollywood's 'How to Bake' book. With the weather being slightly grim a good comforting loaf was in order and there aren't many things more comforting than warm cheesey, bacon bread. Definitely best eaten when warm.


Ingredients:

  • 400g strong white bread flour
  • 100g rye bread (the original calls for strong wholemeal flour)
  • 10g salt
  • 10g instant yeast
  • 30g unsalted butter
  • 330ml water
  • 8 rashers of bacon, cooked and chopped
  • 150g cheddar cheese
  1. Put the flour, salt, yeast and butter in a bowl. Make sure the salt and yeast are at opposite sides of the bowl. Mix the butter in with your fingers.
  2. Put the bowl on the stand mixer and begin to add the water, keep adding until a rough dough is formed. Knead for another 5-10 minutes.
  3. When the ball forms a smooth skin pop it into a lightly oiled bowl. Cover the bowl with cling film and leave to raise for around an hour until it doubles.
  4. Once the dough has risen begin to knead in the cheddar and bacon. Don't knead for too long.

  5. Divide the dough into 4 pieces and form oval loaves and place onto two baking sheets. Cover with more cling film and leave to rise again. Pre heat the oven to 200c.
  6. Once risen and the oven is up to temperature sprinkle the loaves with olive oil and bake for around 20 minutes. Tap on the bottom to ensure a hollow a sound.

Tuesday 26 August 2014

Ooey Gooey Chocolate Fondant


I was lucky enough to be bought some Paul A Young chocolate by my Dad last week. It's rated as some of the best chocolate in the country so I wanted to do something pretty special with it. Really there was only one thing that I wanted; an ooey gooey chocolate fondant.

Ingredients:
50g chocolate (dark is best but I used milk here to make it almost like a sticky toffee pudding sauce)
50g unsalted butter, plus extra to grease
50g plain flour
1 egg
1 egg yolk
60g caster sugar
2tbsp cocoa powder


  1. Preheat the oven to gas mark 4, 160c. Butter two ramekins and then dust lightly with cocoa powder.

  2. Melt the chocolate and butter in a glass bowl over the top of a saucepan, make sure the bowl doesn't touch the water. Put aside the bowl to cool. 
  3. In a stand mixer whisk together the egg, egg yolk and sugar.

  4. Mix in the cooled chocolate mixture and then sift the flour on top. Slowly fold in using a figure of 8 motion.
  5. Pour the mixture into the two ramekins and bake for around 15-17 minutes. You want there to be some cracks on top but not overcooked.